[si ⇊⇊]
Project was developed exclusively for the BILAGA special edition.
BILAGA is a publishing project by artists Mari Lagerquist & Lina Persson. BILAGA is a quarterly deliver mail-art to the subscribers, who receive limited editions of text art, concrete poetry, cut-ups, manual art, objects, collage, printed matter etc. into their mild box four times per year.
LIQUID SOUNDING / AURELIA 1+hz / RESISTANCE SENSITIVE SYNTH
by Robertina Šebjanič #2 2015
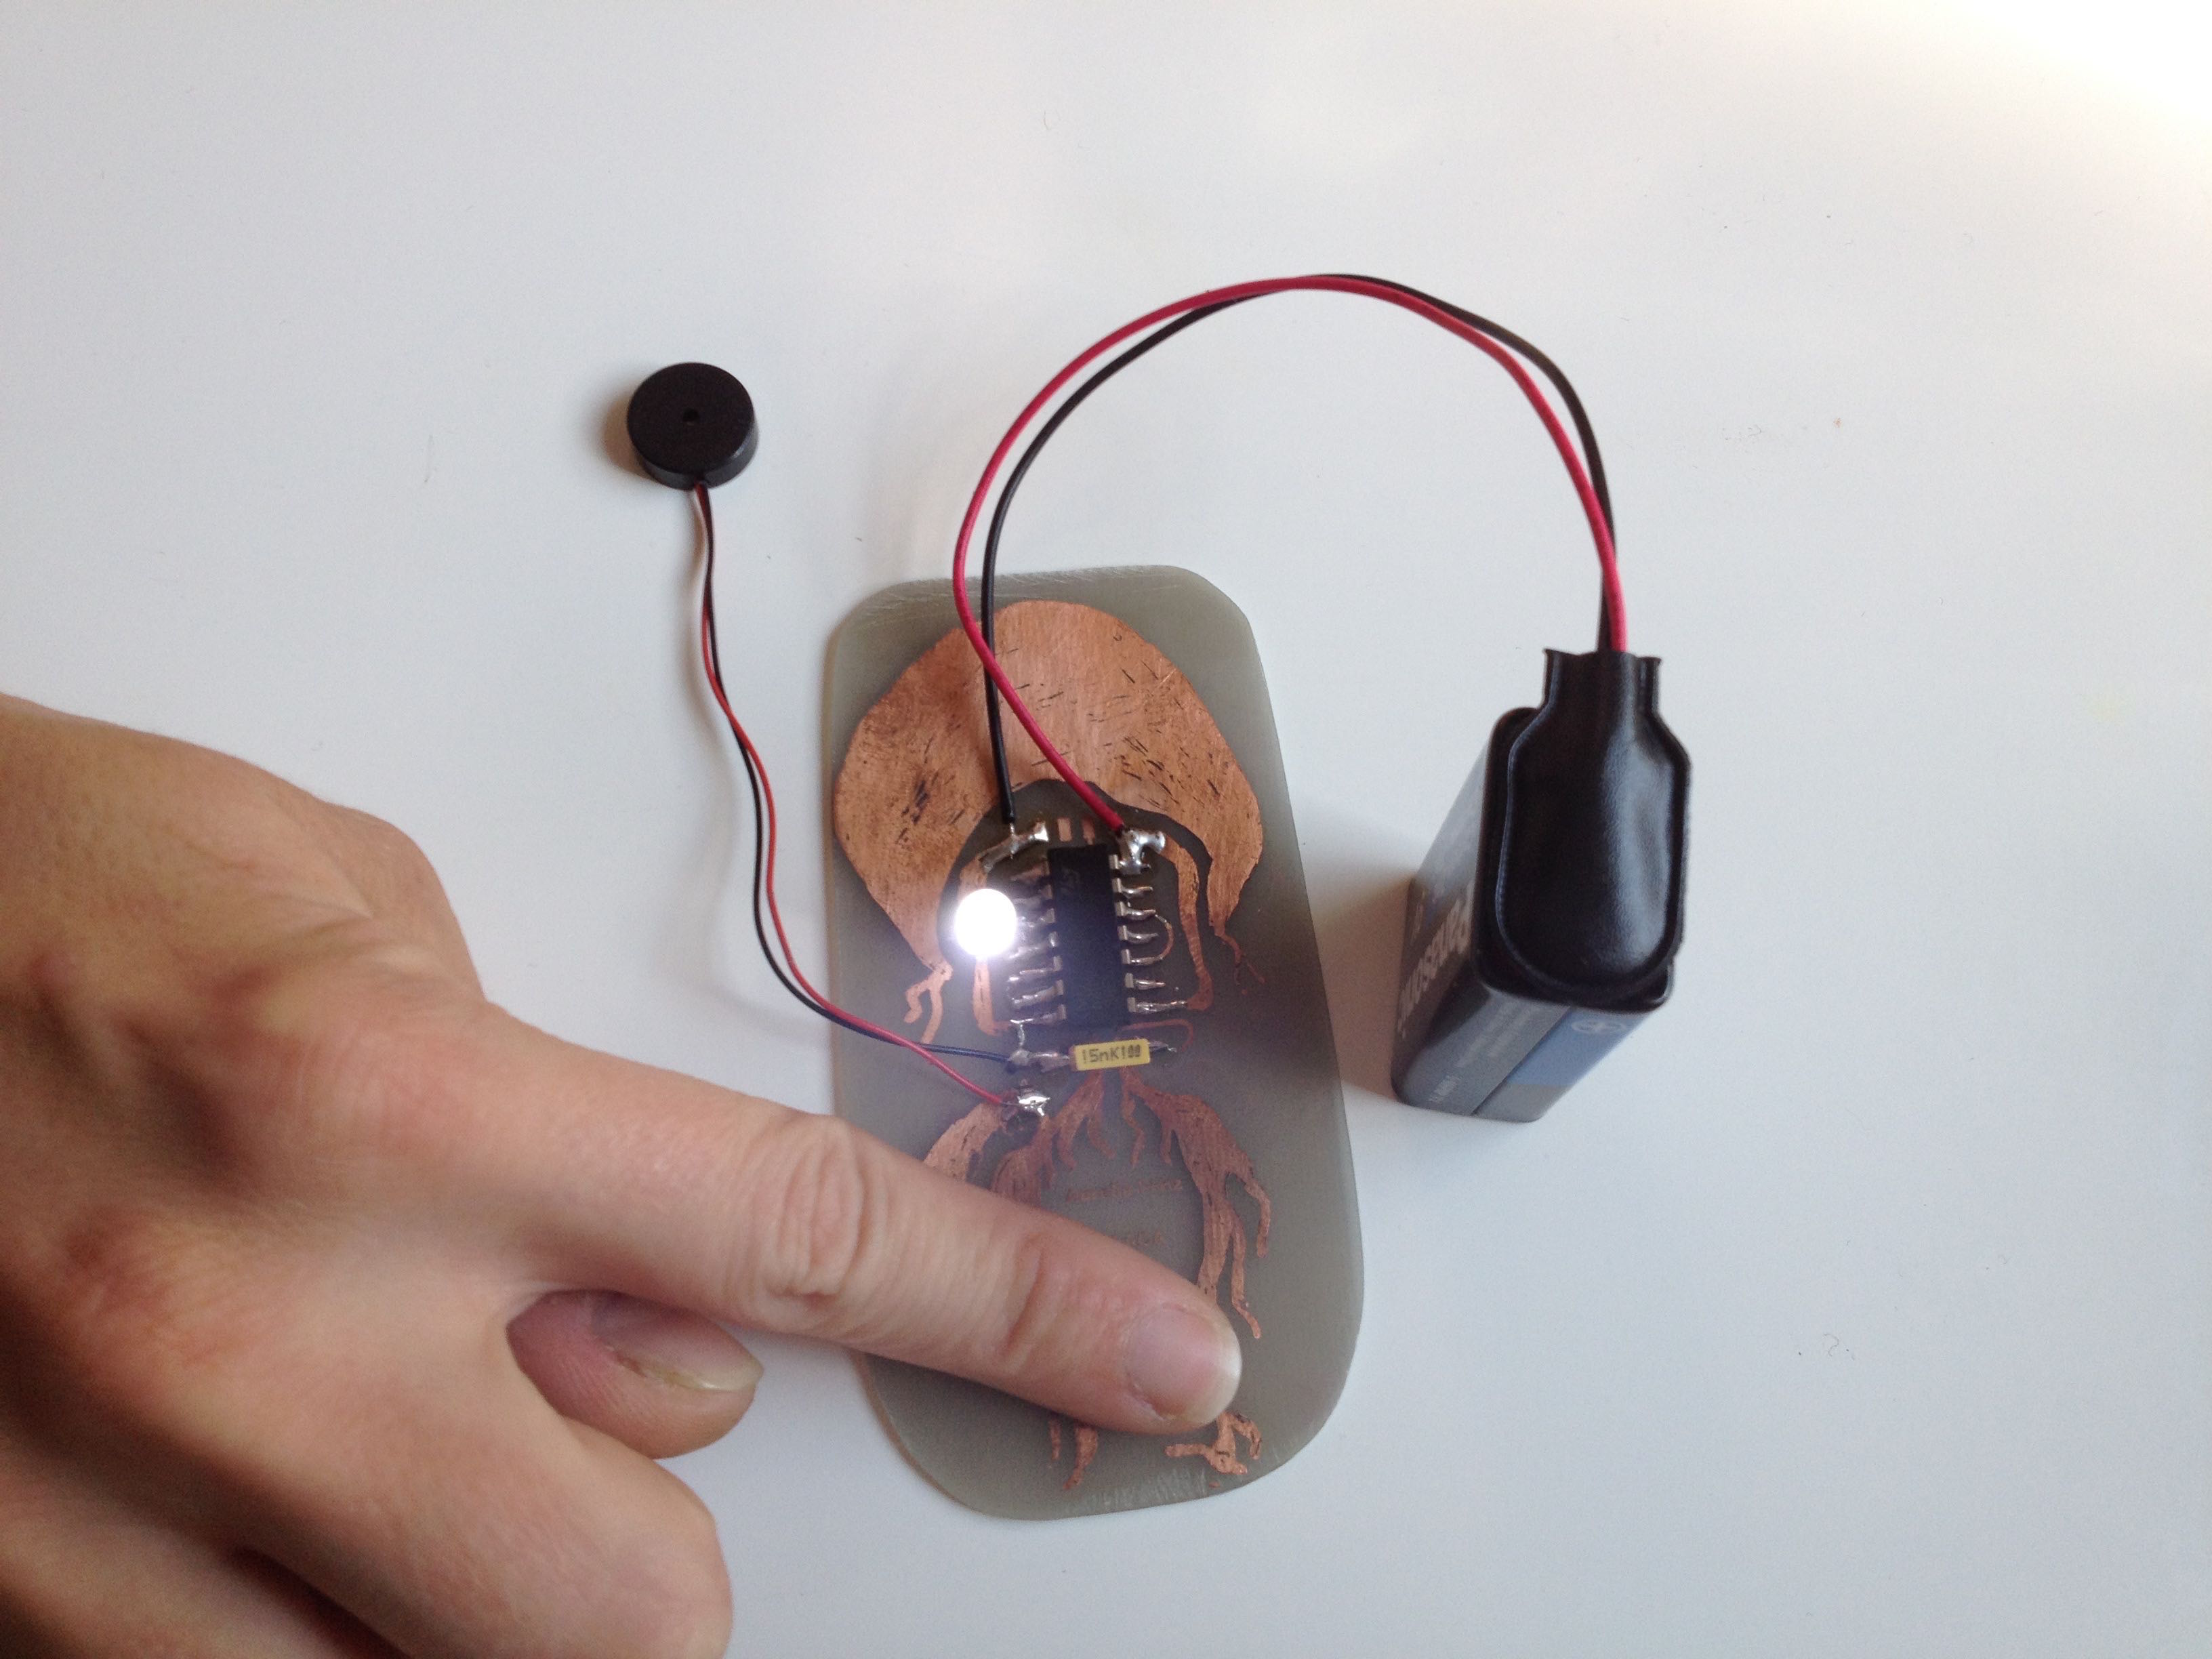
A simple circuit, hand-made pcb in a limited edition of 50 however each piece is unique.
The work consists of an oscillator and a resistive sensor. The output is a blinking led light and a small piezo speaker that produces sound when the circuit is complete.
List of components:
1x PSB (jellyfish circuit)
1x 4093 chip (black cube with 14 legs)
1x piezo speaker
1x 100k capacitor (yellow cube)
1x LED
1x 9v battery socket
Extra items you will need to make it work:
You will need soldering iron, soldering station, some tools and 9V battery.
How to make it:
Please have a look at the schematic.

Some hints to help you:
Solder the chip first and be careful that is turned into the right position, do orient by the a small (half)spherical point on a chip, that has to be oriented to the jellyfish hat. LED component is polarised, that means you need to solder them in a specific orientation – follow the pluses (+) and minuses (-) on the schematic. Be aware where to put the battery socket and piezo speaker (the red wire is + and the black – (ground). When you finish with the soldering, plug the battery and touch the jellyfish by the tentacles and enjoy making sound with it.


*The pcb for the device was developed by Marc Dusseiller and colleagues ala Hackteria style: http://wiki.sgmk-ssam.ch/index.php?title=Vive_la_Resistance_aka_NanoSmano_Sajica
Watch the work when finalized: https://vimeo.com/135559795

From Ljubljana by buss to Venice, from Venice to Rome with train and from Rome to Gothenburg by plane and finally dispersed in the mail system to a wide variety of addresses. Robertinas jellyfish synths have travelled long distant without touching water.
Photos of the making the pcb at the Ljudmila lab:


Projekt je bil razvit posebej za posebno izdajo BILAGA.
BILAGA je založniški projekt umetnic Mari Lagerquist in Line Persson. BILAGA je četrtletna poštna umetniška izdaja (mail-art), pri kateri naročniki štirikrat na leto prejmejo omejene izdaje besedilne umetnosti, konkretne poezije, izrezank (cut-up), ročnih umetniških del, objektov, kolažev, tiskovin in drugih umetniških artefaktov neposredno v svoj poštni nabiralnik.
TEKOČE ZVOČENJE / AURELIA 1+Hz / UPOROVNO OBČUTLJIV SINTETIZATOR
Robertina Šebjanič #2, 2015
Preprosto elektronsko vezje, ročno izdelano tiskano vezje (PCB), izdano v omejeni seriji 50 primerkov, pri čemer je vsak izdelek unikaten.
Delo je sestavljeno iz oscilatorja in uporovnega senzorja. Izhodna signala sta utripajoča LED-lučka in majhen piezo zvočnik, ki začne proizvajati zvok, ko je električni tokokrog sklenjen.
Seznam komponent:
- 1 × PCB (vezje meduze)
- 1 × čip 4093 (črni kvader s 14 nožicami)
- 1 × piezo zvočnik
- 1 × 100k kondenzator (rumeni kvader)
- 1 × LED-lučka
- 1 × priključek za 9V baterijo
Dodatna oprema, potrebna za delovanje:
Za izdelavo potrebujete spajkalnik, spajkalno postajo, nekaj osnovnega orodja in 9V baterijo.
Izdelava:
Oglejte si shemo vezja.
Nekaj namigov za pomoč:
Najprej prispajkajte čip in bodite pozorni, da je pravilno obrnjen. Orientirajte ga glede na majhno polkrožno oznako na čipu, ki mora biti obrnjena proti »klobuku« meduze.
Komponenta LED je polarizirana, kar pomeni, da jo je treba prispajkati v pravilni smeri – sledite oznakam plus (+) in minus (–) na shemi.
Pazite tudi na pravilno namestitev priključka za baterijo in piezo zvočnika (rdeča žica je pozitivni pol (+), črna žica pa negativni pol oziroma ozemljitev (–)).
Ko končate s spajkanjem, priključite baterijo in se dotaknite lovk meduze. Uživajte v ustvarjanju zvoka z njo.
* Tiskano vezje za napravo so razvili Marc Dusseiller in sodelavci v duhu pristopa Hackteria:
http://wiki.sgmk-ssam.ch/index.php?title=Vive_la_Resistance_aka_NanoSmano_Sajica
Ogled končnega dela:
https://vimeo.com/135559795
Iz Ljubljane z avtobusom do Benetk, iz Benetk z vlakom do Rima in nato z letalom v Göteborg; od tam pa so se meduze razpršile po poštnem sistemu na različne naslove po svetu. Robertinine sinteze meduz so prepotovale velike razdalje, ne da bi se kadar koli dotaknile vode.
You must be logged in to post a comment.